
Updated Supply List for the '10-Minute Sketch-Walk' Series
Here’s what you’ll need for the upcoming class series.
This class will be covering four (4) basic steps in this process of taking the ten-minute sketch walk all the way to bigger looser semi-abstract landscape paintings. So I’ll list these supplies according to these steps.
1.Step 1-
-watercolor sketchbook of your choice. The one I’m currently using is 5 1/2 x 8 1/4” and made by Hahnemuhle. The paper is not cotton in this one, just wood pulp, but it’s made for watercolor, is lightweight and portable. The brand isn’t so important here as just so it’s made for watercolor AND is easily portable. If it fits into your coat pocket you’re double lucky! Here’s a link for this one Use what you have, or your favorite. Just don’t let it be so ‘precious’ that you’re afraid to use it though!

-Pigma micron pens (or any favorite permanent ink pens for drawing (though I don’t use Sharpies, they bleed through paper). I bring along 2 in case one runs dry. Perhaps an 02 or 03 nib. Even as large as an 05 nib. Choose your favorite line width. Here’s a link for this one.
-bulldog clips - to hold your pages. Incredibly helpful outdoors or in, whether it’’s windy or your paper is buckling. Get a package of these at Staples. They don’t have to be huge, just hold your page.
That’s it. That’s all you need for the first step.
2.Step 2 -
Here’s where we bring color into the work. ***You can continue to use your favorite little student pan or small travel pan for this step….but on the following steps, you’re going to want a bigger palette with more mixing space.
-Mijello paint palette. This has 18 wells and a nice tray you can remove for more mixing space if necessary. I’ve been using this one for several years now and really love it. It’s small enough that I take it on travel with me, but large enough to use on my desk for small to mid-sized paintings out of the sketchbook. Here’s a link for this.

Here are the colors I’m currently using. The starred colors are the ‘must-haves’. I’ve made a few changes over the years, but it’s pretty similar to this:
*-DS-Lemon Yellow (or a cool transparent yellow)
*-DS- New Gamboge(a warm mid-value transparent yellow)
-DS- Naples Yellow (a pale, neutral opaque)
*-DR-Raw Sienna-transparent earth color
*-DS-Quinacridone Gold - transparent
*-DS-Burnt Sienna - workhorse color, can’t live without (like a dirty orange/brown)
-DS-Pyrrol Orange
-DS- Cadmium Red Medium Hue
*DS-Quinacridone Rose (transparent cool red)
-DS-Rose of Ultramarine (transparent purple, can mix from quin rose & Ul. Blue)
-DS-Lavender (opaque)
*-DS-Cobalt Blue
*-DS-French Ultramarine Blue - (can’t live without Ultramarine Blue)
-DS-Pthalo Blue (transparent blue, dark, intense, staining)
*-DS-Cobalt Teal Blue - on it’s own or mixed with others - makes nice aqua greens
-DS-Green Apatite Genuine - a very interesting granulating green, not totally necessary but beautiful and fun.
-DS-Pthalo Yellow Green - strong brilliant transparent yellow green, great for mixing
-WN-Neutral Tint - does exactly what it says, darkens and neutralizes colors. I rarely use it, but it can be handy in a pinch.
*-DS-Green Gold OR Sap Green - (note, there are some brands of Sap Green out there that are NOT transparent and can end uplooking like MUD on its own or mixed with anything else. Avoid the heartbreak, go with DS.
-DS-Cerulean Blue (a beautiful opaque that is fun for layering a veil of color on)
*Quor or DS - Titanium White - I don’t use white that often, but when I do, I want an opaque one.
Note - for the week when we are practicing loose brush work in single color value studies, you might like to use one of these dark colors. I’m suggesting these because they ARE dark and rich and have a gorgeous value range. You’ll have a lot of fun experimenting with any of these….I recommend choosing one …or perhaps just starting with one of these:
-DS-Sodalite Genuine - rich black & granulates in beautiful ways
-DS-Perylene Green - deep earthy neutral green with a nice value range
-DS-Undersea Green - deep warm green that will separate out into blues and yellows
-DS-Moonglow- deep purple blue/almost black, that separates out into deep blue and rose.
-WN-Paynes Gray - of all the various brands that make this blended color, WN definitely has a deep blue cast (and not battleship gray).
Brushes - for most of the sketchbook work, you’ll want a size 6 round, perhaps an 8 round. In the later weeks, when we start working a bit bigger you’ll want a larger brush, perhaps a size 12 round and also a 1” flat. One of my favorite brushes for very expressive painting is the #10 Escoda Versatil. It’s got longer bristles and holds a point nicely. So it carries a lot of paint, but can also hold a point for fine lines.
3.Step 3 - Here’s where we’ll practice a bit of larger looser work, some of it in your sketchbook, some of it on better paper. For very inexpensive practice work you can use a sketchbook like the Strathmore Mixed Media 500 series, 100% cotton.

Bulldog clips, to hold your pages (even indoors, so your paper doesn’t buckle). either a 8” x10” size or a 9”x12” size.
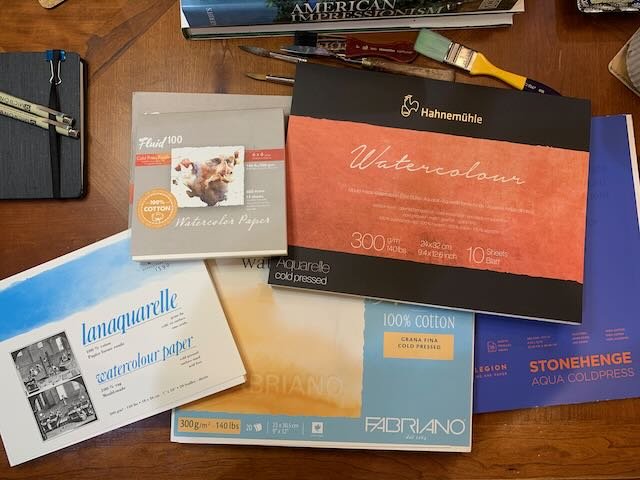
You will also want to get some ‘good paper’. You can either buy this by the sheet or in a block. Brands like Arches, Fluid 100, Fabriano, Hahnemuhle, Legion, ….get 140lb. cold press paper. We’ll be practicing simple brushwork first on the sketchbook pages, and move to the better paper for our single pigment value studies, and our full color paintings.
4.Step 4 - Finishing, and mounting a painting so that it doesn’t need to be sealed under glass:
-Kamar Varnish by Krylon
-Extra Heavy Gel Gloss by Golden
-Dorland’s Wax Medium
-nitrile gloves from hardware store
-brayer
-clean, lint-free cotton rag for buffing wax
-xacto knife or craft knife with new clean blades
-gessobord by Ampersand (panel) in the size you want to mount painting on - they come in standard sizes).
